This article assumes you are configuring ProsperOps access for a Savings Analysis.
- Open a new browser tab, navigate to the AWS Console, and log in to the Management Account.
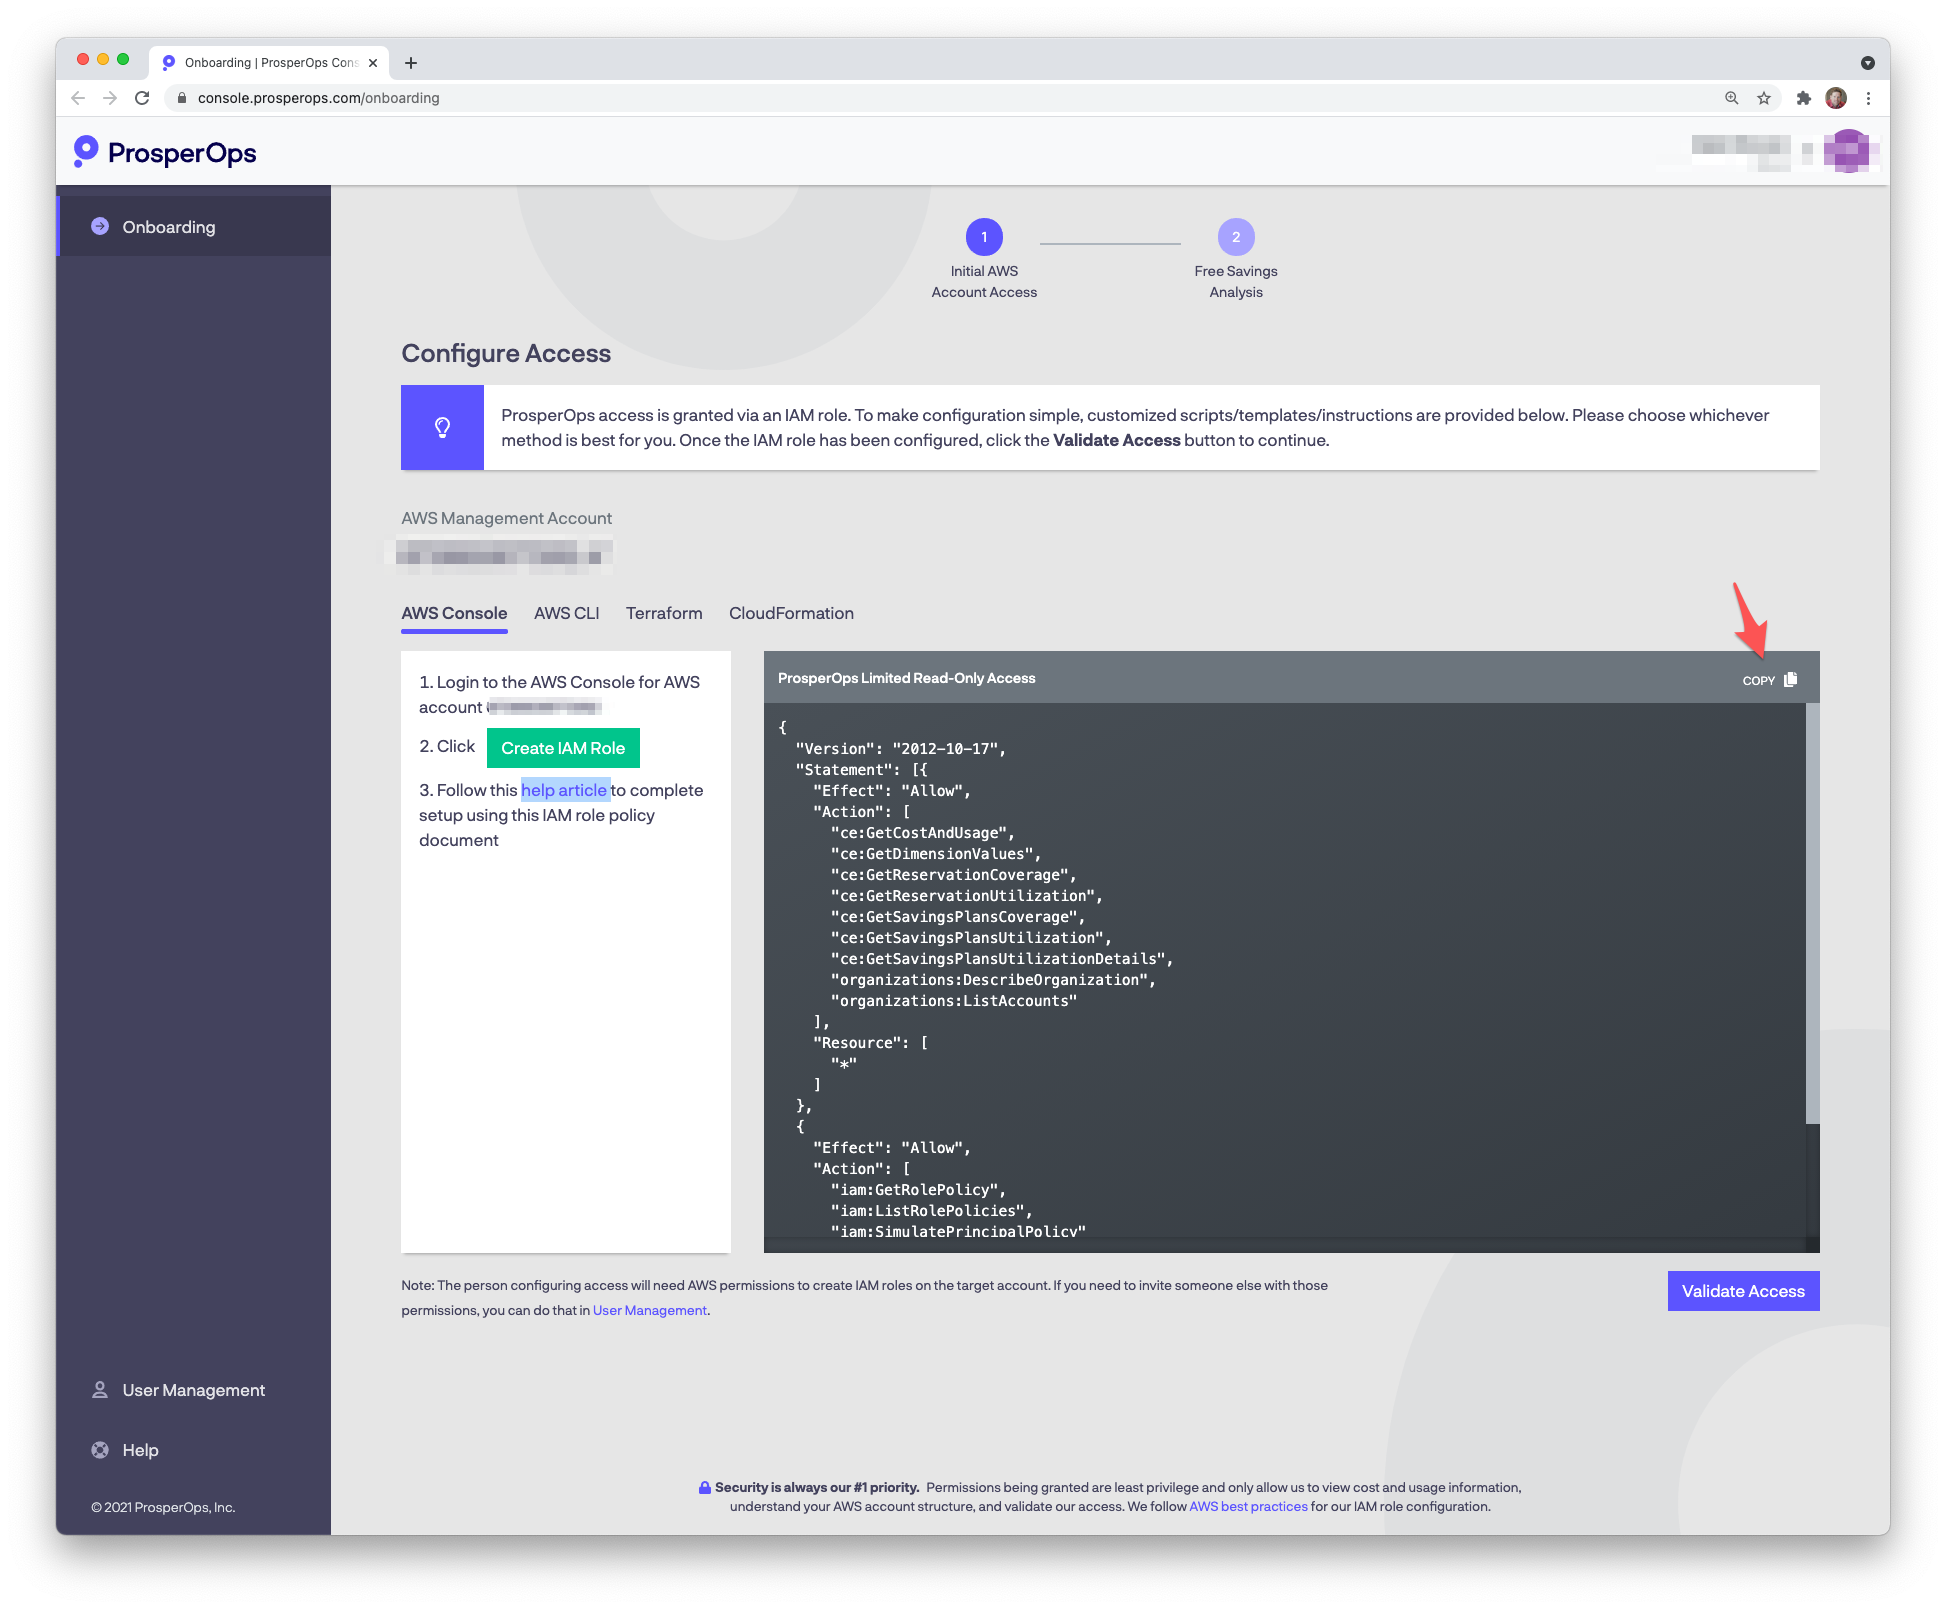
- Return to the ProsperOps Console and click the Create IAM Role button.
⚠️ IMPORTANT NOTE: If you skip the step of clicking Create IAM Role and attempt to create a ProsperOps role manually, your role will be missing critical IAM configuration settings which will not work. Please do not skip this ☝️ step!!

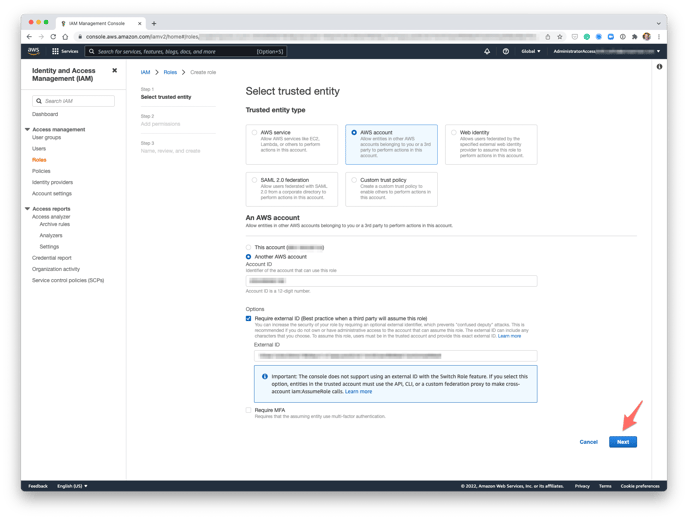
- You will be taken to the Create IAM Role page in the AWS Console with various ProsperOps non-permission role details (e.g. entity type, account ID, external ID) pre-populated. Click Next.
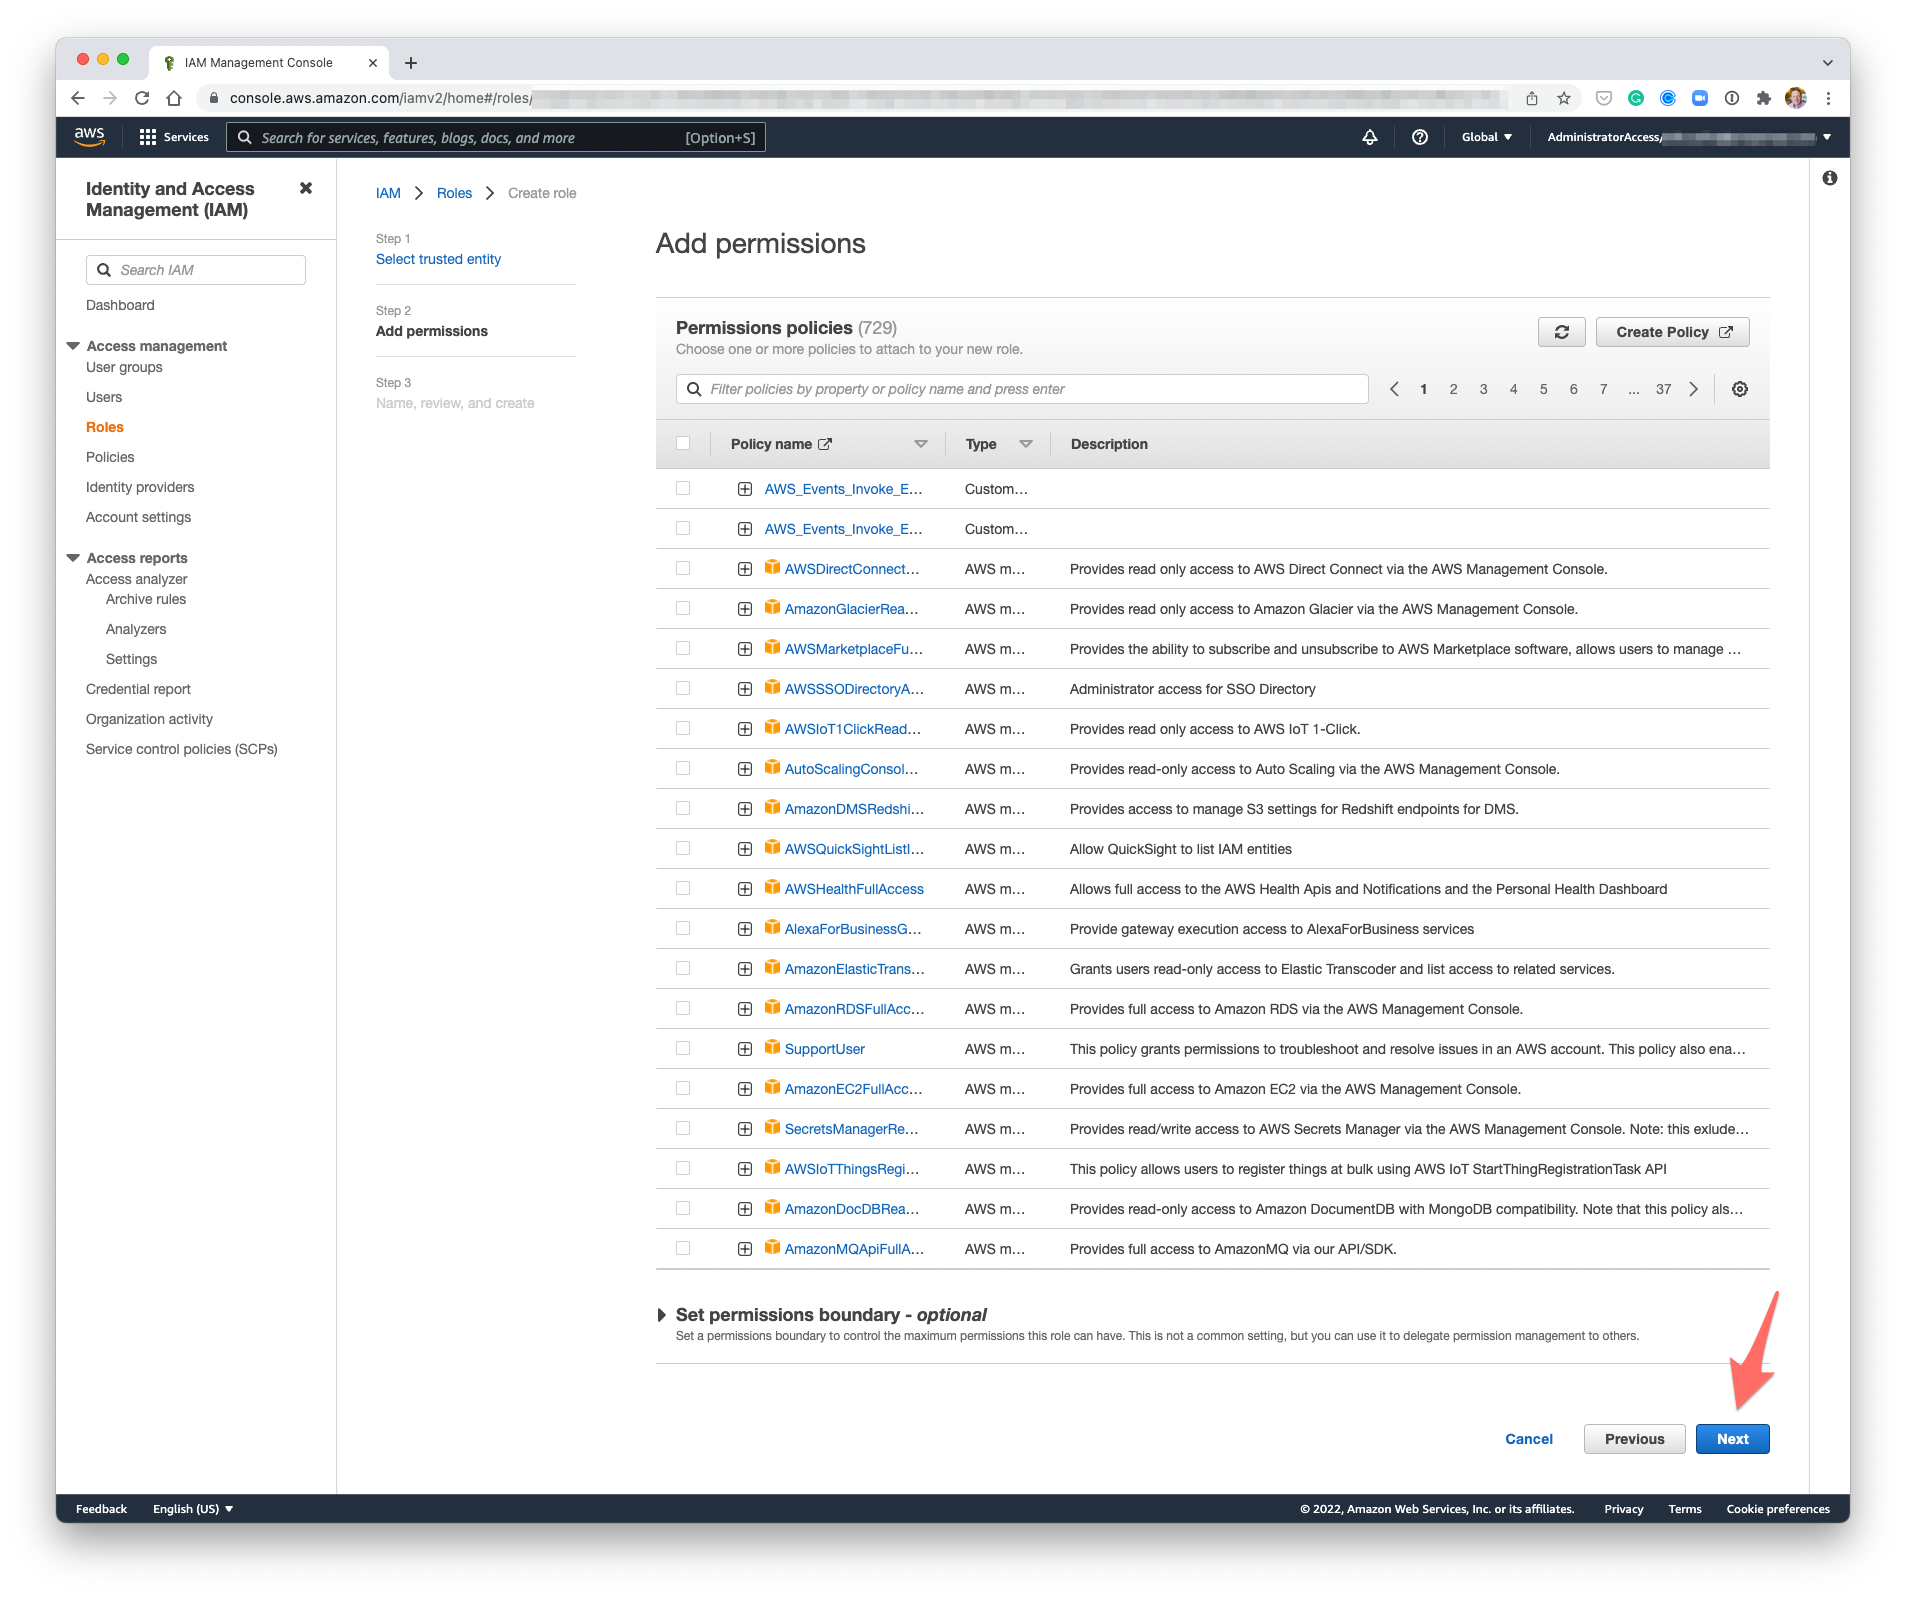
- We're going to add an Inline policy after we create the role, so just click Next.
-
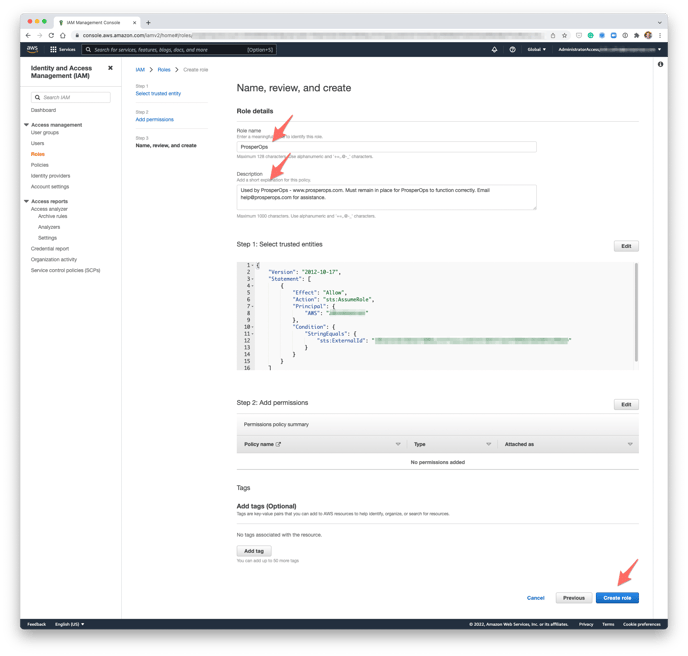
Enter the following Role name (IAM role names are case sensitive so please enter EXACTLY as shown, ideally just copying the text below 😎 ):
ProsperOps
- Enter the following Description:
Used by ProsperOps - www.prosperops.com. Must remain in place for ProsperOps to function correctly. Email help@prosperops.com for assistance.
- Click Create role.
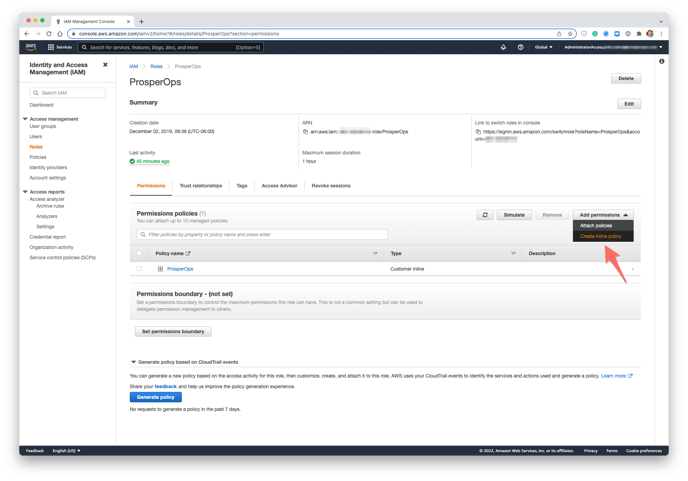
- Click on the newly created ProsperOps role to open the Role Summary screen then click on Create inline policy as shown.
- Return to the ProsperOps Console and click the copy icon in the upper right corner of the policy window to copy the IAM policy to your clipboard.
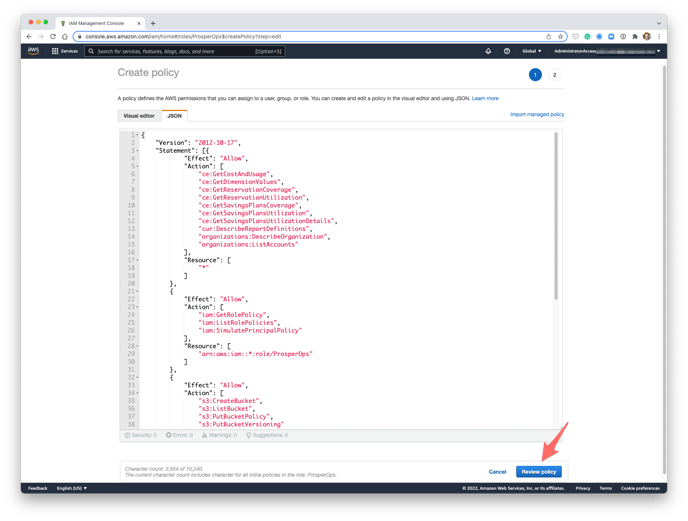
- Return to the AWS Console. Select the JSON tab, paste the IAM policy into the editor, then click Review policy.
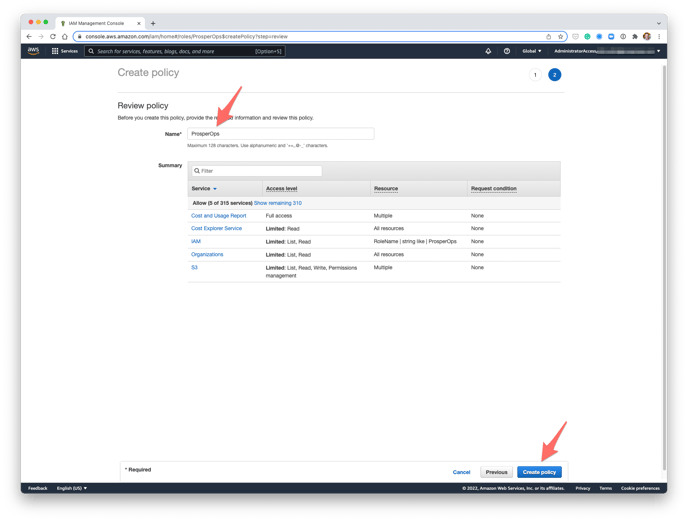
- Enter the following policy Name:
ProsperOps
- Click Create policy.
- A ProsperOps IAM role has now been created with the necessary least privilege policy permissions.
- Return to the ProsperOps Console and click Validate Access.

- Once access is validated, you are ready for a Savings Analysis! 🎊